Summary
To successfully run a regular giving programme, there are a few key areas to set up. These are outlined below, along with supporting articles for each step.
Payment Gateway Setup - Start by selecting a payment gateway. FundraiserOne supports a wide range of providers, and you can follow the linked article for step-by-step guidance.
Campaign, Operation & Product Setup - Define your Campaigns, Operations, and Products. This ensures all regular gifts are processed consistently and makes reporting much easier.
Templates - Create the necessary templates, including:
Receipt templates
Email templates
Print templates (which can be sent as PDFs alongside emails)
These help ensure supporters receive clear and professional communications.
Widgets - Set up your widgets to support both new and existing donors:
A donation widget to capture new one-off and regular gifts
A payment widget to allow supporters with failed payments to securely update their card details
Scheduled billing settings
This section allows you to configure batching periods, which determine when transactions are grouped and processed automatically by the system.
You can also set up retry processing rules, defining how many times the system should attempt to process failed credit card payments.
Additionally, Notification Billing can be enabled here. This is typically used when all retry attempts have been exhausted without a successful payment. In these cases, the system can automatically send an email to the supporter, prompting them to update their card details.
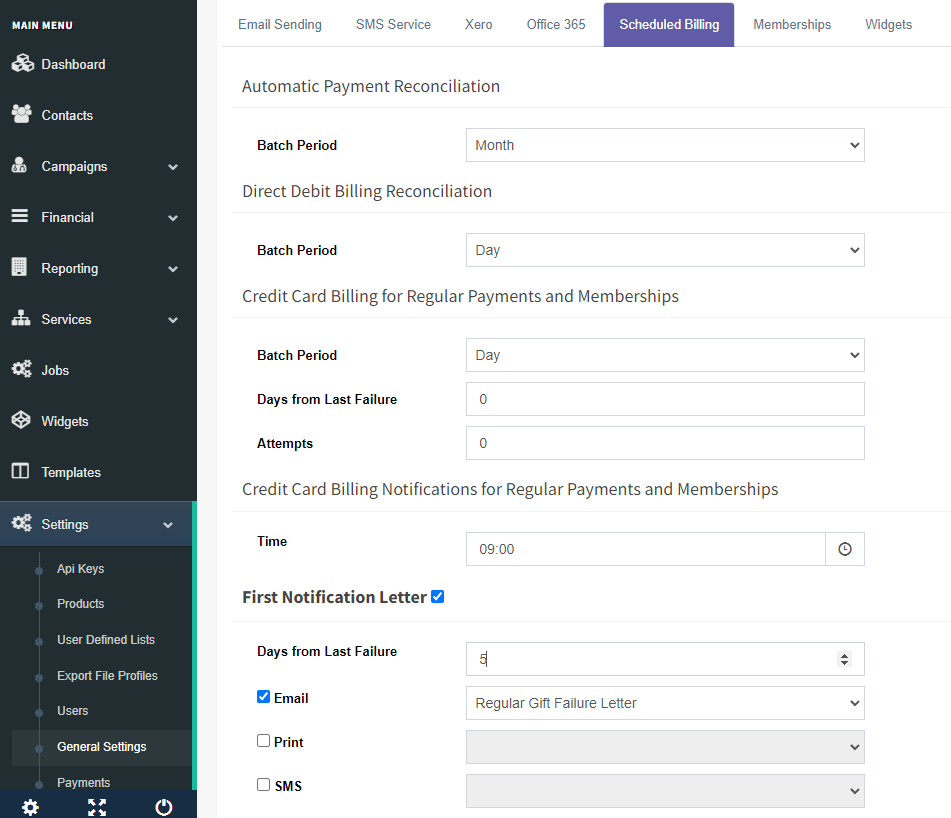
Configuring scheduled billing
Select Settings > General Settings to access the regular giving setup. All required configuration options are located in the Scheduled Billing tab.
Batch Period
This setting allows the system to create batches for specific payment types. Select your preferred option here. The configuration below reflects a typical setup.Retry Billing
Configure how the system handles failed payments by setting:Days from Last Failure: e.g. 2 days — the system will retry the payment two days after the initial failure.
Attempts: e.g. 2 attempts — the maximum number of retry attempts before stopping.
Setting these values to 0 will disable the retry function.
Time
Specifies when notification emails are sent as part of Notification Billing (e.g. informing supporters of failed payments).
Note Processing services run automatically each day at midnight.Notification Billing
This feature sends emails or merged print letters after all retry attempts have been completed and the payment is still unsuccessful. Up to three notifications can be sent before the supporter is passed to the Call Centre for follow-up.
Notification billings
Billing Notifications allows failed credit card regular payment donors to be managed automatically. FundraiserOne processes credit card regular giving donors automatically and will also retry if payments have failed. This is called the retry process, when the retry process ends the system can be set to send Billing Notifications generally an email being sent with a link asking the donor to enter new details. Once details are entered the payment is processed and the new card token details are stored for future billings.
This feature can be enabled and set up easily and following steps will show you how to set it up.
Step 1: Create a Widget using the Widgets menu as type Payment. Create a page on your website and add the widget code this will now become your payment page.
Step 2: Create an Email Template with a link to the Payment Page.
Step 3: Activate Notification Billing in FundraiserOne and assign associated templates.
Notification billings allow for a maximum of three notification triggers. This is where the system can automatically send an email, generate a print notification, or send an SMS to the donor.
This functionality is typically used when a credit card payment has failed. After the system has retried the payment, the next step is to send a notification to the donor.
Templates will need to be created for each communication channel used in the workflow. As there may be up to three separate notifications, these can either use three distinct templates or a single template adapted for all notifications, depending on the communication strategy and branding requirements.
It is also important to create and implement a Payment Widget on your website. The widget should be referenced within the notification templates using a direct URL, ideally presented as a prominent button or hyperlink, allowing recipients to easily access the payment page and complete their transaction.
Note: Notification billings only sends notifications to failed Credit Card regular givers only.
The system can send up to three notification letters and the Time determines when it will send them, which are scheduled based on the number of days since the last failure. Care must be taken to ensure these notifications are processed only after the retry process has completed.
In the example below, retries occur twice on the second day. It is recommended to schedule the first notification after these retries have finished. In this case, the first notification is set for the sixth day, provided the status remains as failed.
Additional notifications can also be added throughout the workflow. If a second notification is configured, the Days Since Last Failure value should be set higher than that of the previous notification. For example, if the first notification is sent after an earlier interval, the second notification could be configured to trigger on the 12th day following the failed payment attempt. This ensures notifications are delivered in the correct sequence and at the appropriate intervals.
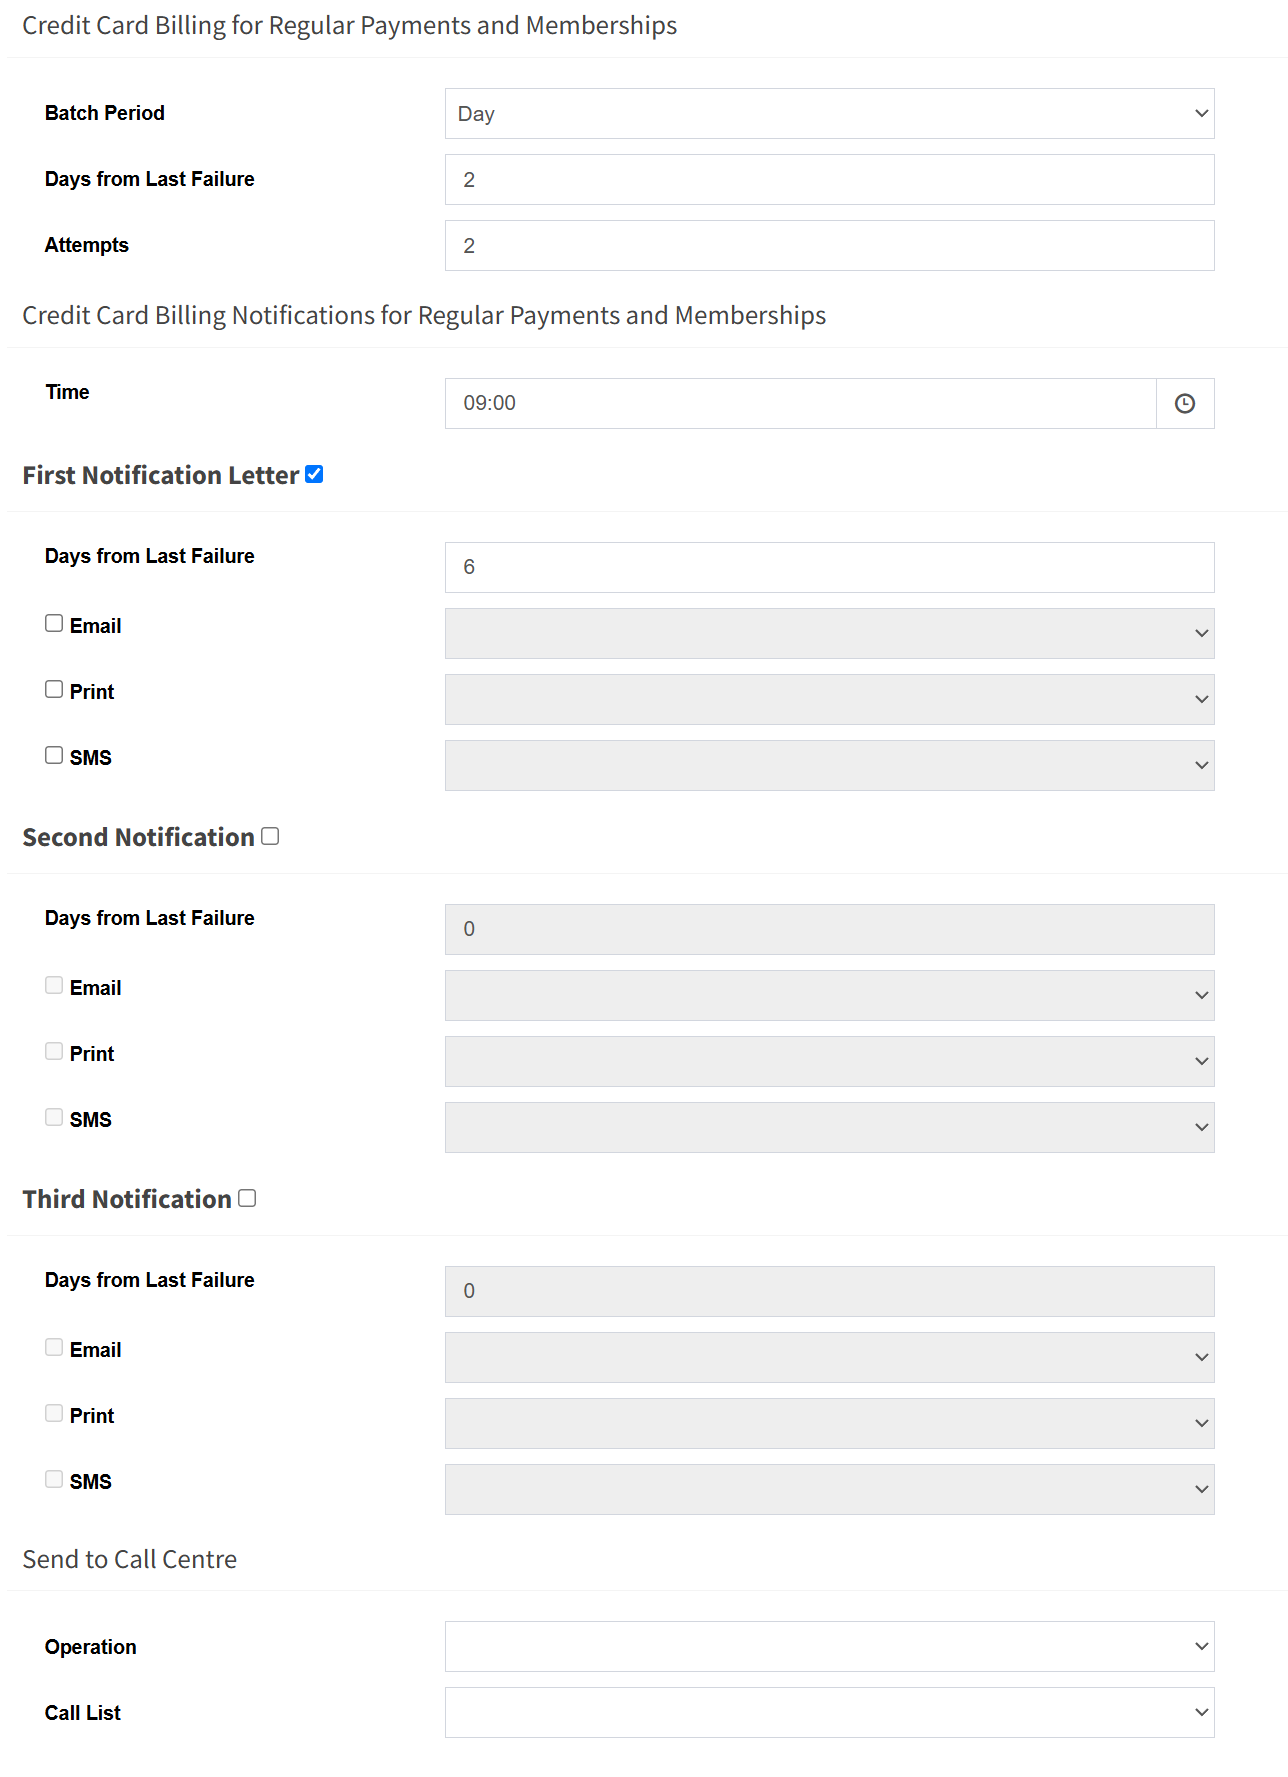
The final step in this workflow is to add the record to the designated Call Centre Operations list, where it can be assigned to a staff member for follow-up. The staff member can then contact the individual directly to discuss the failed payment and assist with resolving the issue.