Summary
FundraiserOne can be integrated with Xero to enable the direct transfer of banking transactions between the two systems. Once configured, users can send banking batches to Xero using the Send to Xero function in FundraiserOne, eliminating the need for manual file exports and imports.
Prerequisites
Before transactions can be exchanged between FundraiserOne and Xero, the General Ledger (GL) structure must be aligned between both platforms.
Step 1: Obtain General Ledger Codes from Xero
Log in to Xero.
Navigate to Accounting > Advanced > Chart of Accounts.
Print or export the Chart of Accounts.
Identify the General Ledger codes that will be used for fundraising products, operations, income, and other transaction types.
Step 2: Add GL Codes to FundraiserOne
Log in to FundraiserOne.
Open User Defined Lists.
Create or update the list containing the Xero General Ledger codes.
Enter the GL codes exactly as they appear in Xero.
Important: GL codes in FundraiserOne must exactly match the corresponding codes in Xero. Any discrepancies may prevent transactions from being posted correctly.
Step 3: Assign GL Codes
Once the GL codes have been added:
Assign the appropriate GL codes to Products.
Assign the appropriate GL codes to Operations.
Verify that all fundraising activities have the correct account mappings.
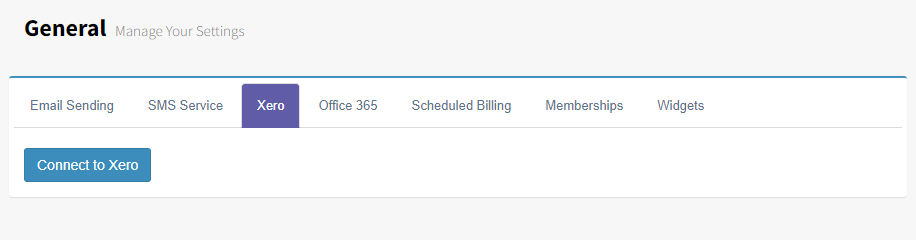
Once the General Ledger Codes are loaded and assigned go to Settings and General Settings and select the Xero tab. From here you can connect Xero with FundraiserOne.
Sending Bankings to Xero
To send a Banking to Xero follow the following steps.
Note: This process requires Xero to be connected via Settings.
Step 1: Go to the Banking section FundraiserOne by selecting Bankings under the Financial menu.
Step 2: Select the Banking and press the Send to Xero button.
The Banking screen will appear stating which banking you have selected, the date of the banking, and are you sure you want to send this banking to Xero.
There are some fields used for tracking these can be used if required. ‘Reference ID’ or ‘Reference Name’, Tracking Name and Tracking Option.
Name could be the Banking ID and Date, the tracking option are used for keeping track of different costs/donations among different areas of the organisation.
There is also options ‘Exclude Direct Debits’ and/or ‘Exclude Auto Payments’.
Step 4: Select ‘Send to Xero’
Viewing banked data in Xero
Step 1: Login into Xero.
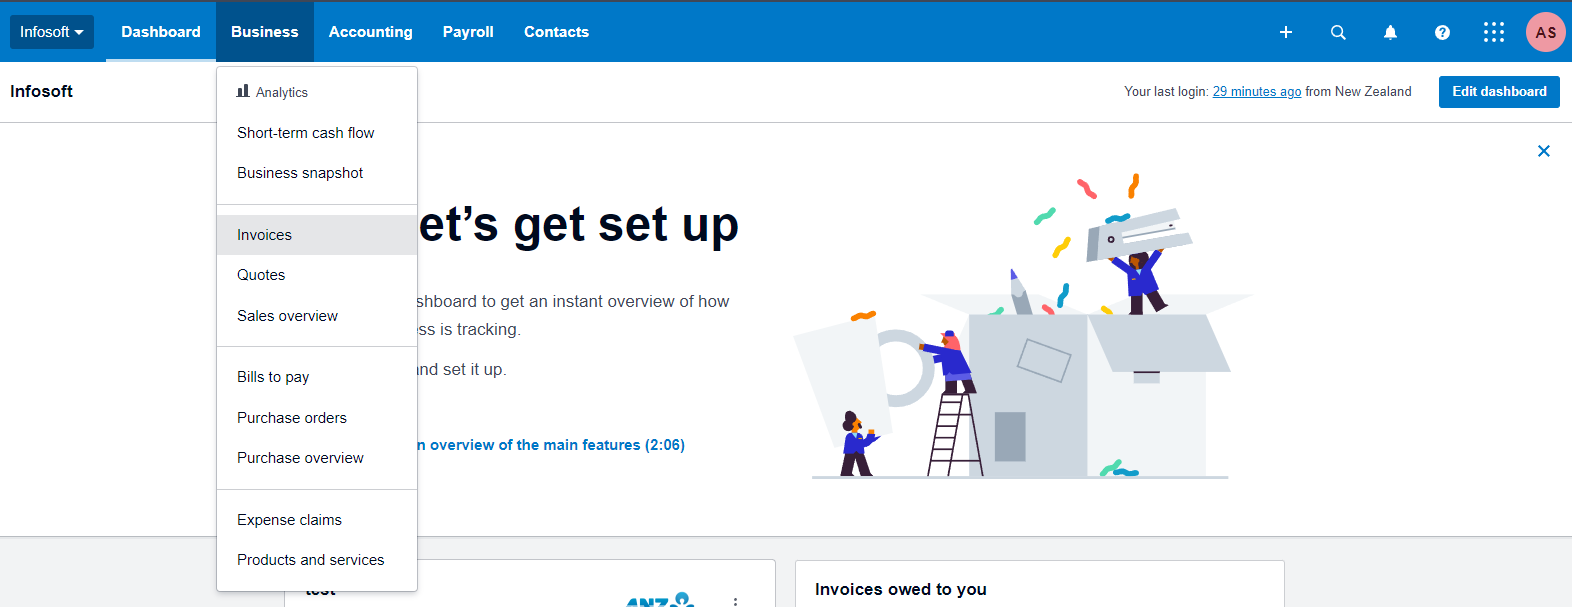
Step 2: Go to the Business menu and select Invoices as shown below.
Step 3: All records can be found in Draft tab. From here payments can be viewed and approved.
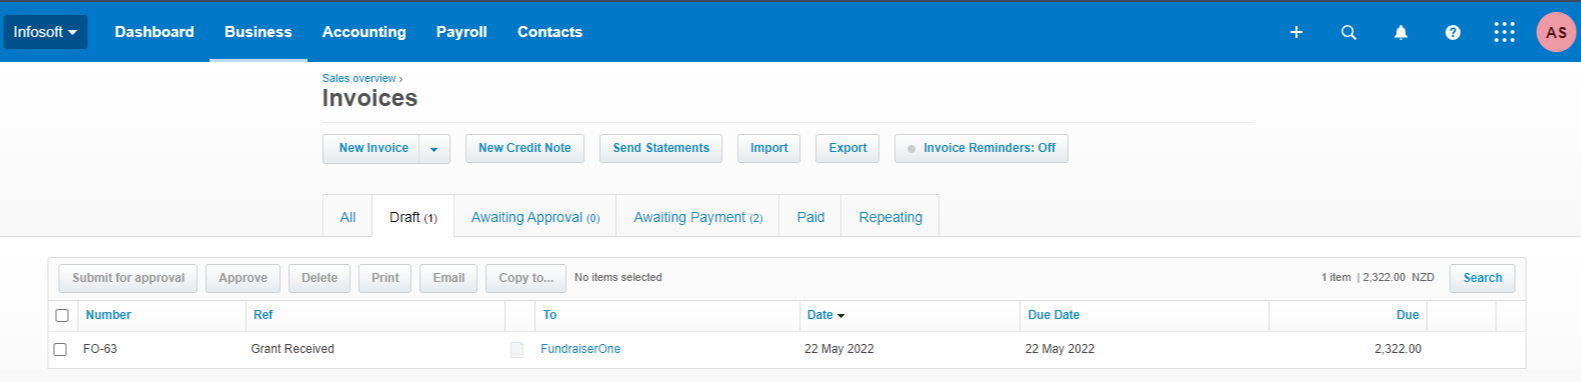
Step 4: From here they can be approved and deposited if the transactions match the banked amounts.