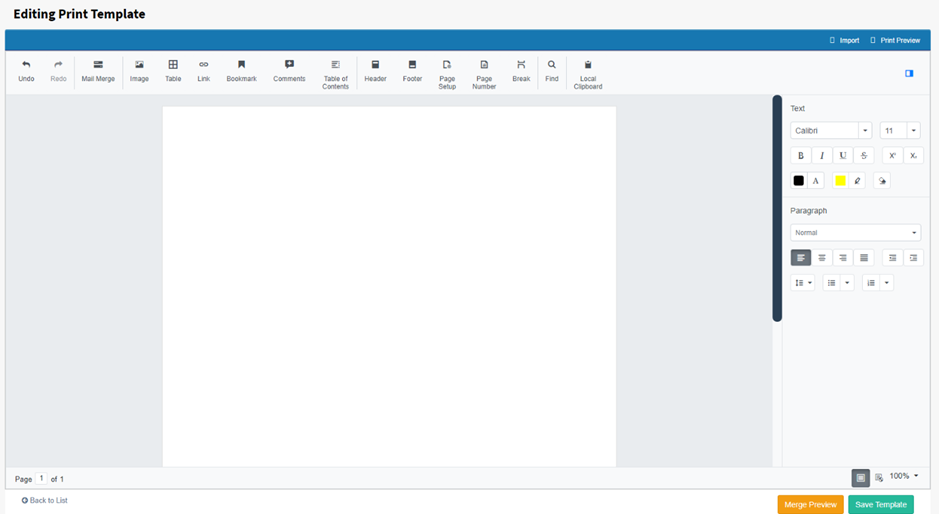
The Print Template Designer works much like a simplified version of Microsoft Word, making it easy to create and edit receipt templates without needing advanced design skills. The layout is familiar, with tools for navigating pages, importing documents, and previewing your work.
Page Navigation:
In the bottom‑left corner, you’ll find page controls that let you move through your document. You can also type a page number directly to jump to a specific page, which is especially useful for longer templates.Importing Templates:
The Import option allows you to bring in existing documents to use as the base for your template. While it’s commonly used for Word files, it actually supports a wide range of formats, including .doc, .docx, .rtf, .txt, and .sfdt. This makes it easy to reuse or adapt documents you already have.Print Preview:
The Print Preview button opens a separate window that shows exactly how your document will look when printed. This is a great way to check layout, spacing, and formatting before finalising your template.
Tip: Always remember to save.
This symbol closes the properties panel.

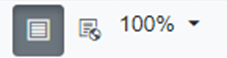
These three options down the bottom right of the page, in order are; print layout of the page, web layout of the page and finally size of the page (only used for looking in/out).
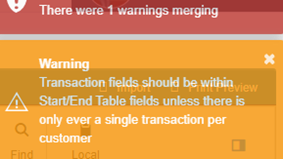
Merge Preview, shows what the mail merge fields will look like once entered, also comments will appear at the top, the message will say ‘Merge ok’ if it is all good.
Adding in a transaction total without a surrounding table doesn’t allowing the template to be saved as it needs a surrounding table.

Once you’re finished viewing, select ‘Undo Preview’ to back to your edit template page.
The Toolbar
Undo & Redo;: First two options are undo and redo.
Mail Merge; Used for adding in fields needed for newsletters, receipts and information like that. Simply select mail merge and a menu on the left-hand side will appear, with all the different available fields. At this time there is most of the contact fields, including addresses, names and regions. And most of the transaction fields are available including the transactions products, operation, description units etc (All amounts should be encircled by ‘start table’ and ‘end table’).
Table: The same as the ‘table’ function in word, select the table button, and a pop-up will appear with ‘Number of Columns’ and ‘Number of Rows’ options available. (You can also add a table into a table, table caption)
After choosing the table size, you can highlight the table and view more options on the right-hand menu, including fill colour, border styles (different borders on/off, border width and colour), merge cells, insert/delete rows/columns/cells, cell margins, and text alignment within the table.
Table Properties - Table: Right clicking on the table brings up ‘table properties’, there are 3 tabs, table, row and cell. Table has width options, in either percentage or points, which can increase/decrease table width, table alignment, indentation and table direction. Table also has more buttons into ‘Borders and Shading’ and ‘Options’.
Table Properties -Table Borders and Shading: After selecting this from table properties, we can see the different choices of borders, underneath the borders title. Underneath style, we have border style, border width and border colour. There is also a preview pane on the right-hand side. At the bottom is shading, you can choose the colour and where to apply the shading to.
Table Options: You can select the default cell margins for each side, and also the default cell spacing.
Table Options - Row: You can specify row height and whether or not the row height can grow (At Least) or is the exact number enter. Also, you can specify additional options; allowing the row to break across pages and if it can be displayed as a header across all pages.
Table Options - Cell: You can specify a preferred width, but this is up for change if other settings give the ability to increase in size, it’s measurable in percentages or points. You can also change the alignment vertically, top, middle and bottom.
Table Options - Cell Options: Similar to table options, select cell margins and an option to change all cell margins to be the same across the table.
Link: Selecting link brings a popup menu where you can write the words to display and the address that the words link to when clicked, also the option is available to use the bookmarks.
Bookmark: Type a name in for the bookmark, eg. Table of Contents. Select ‘add’, you can also select the bookmark and select ‘Go to’ to be taken to where that bookmark is on the page, also can delete. You can use these bookmarks as the ‘link’ in the previous section.
Comments: Gives the ability to add comments, and changes to the template, without it being visible when printed or sent to contacts. The comments can be added and will display your username and the timestamp, along with the ability to edit, delete, reply and resolve the comment. Resolving closes the comment, once closed the option to reopen is available. Reply is just a reply to the comment.
Any changes made will automatically be visible under the changes section, with the ability to sift through the changes, filtering through username, view; inserted/deleted content, and arrow keys for going through pages.
Comments appear like this on the right-hand side of the page, click on them to open the comment menu.
Table of Contents: Table of contents is simple, the options included are number of levels (how many times headings can indent for subheadings), page numbers, right align page numbers and use hyperlinks. Select insert once happy with the choices.
Header and Footer: Options for these are both the same, you can have them different from the first page compared to the rest of the document, and different between odd and even pages. Position is how large they are, 36 is default for normal A4 Letter pages.
Page Setup: Used for changing the page settings.
Margins: How far from each side will information be printed, the lower the number the closer things will be written to the edge of the page. Also, can change orientation of the page.
Paper: You can either choose from the default paper sizes list supplied, or create your own by selecting custom size, and inputting the width and height of the paper.
Layout: Page layout can change the style of the page between even and odd page numbers, different for the first page, and the same header/footer size options as previously shown in header/footer.
Page Number: Adds the currents pages number to where your mouse is clicked on.
Break: Gives the ability to add two different breaks, either a page break or a section break, page break just ends the page and starts new. Section break adds a page break between each of the sections/lines.
Find: Is the same as the find/replace feature in word. Searching for a word highlights all the same words, you can choose for it to be case sensitive or not (Match case) and whether or not it should find words that are whole or partial.