Use the following steps to create a payment widget to receive payments using FundraiserOne's Billing system. This can either be used for Memberships or Regular Payments.
Note: The prerequisites before setting up a Payment Widget you will require the following:
Confirmation/Receipt Templates both Email and Print templates.
Payment Gateway Service.
Step 1: From the side menu select ‘Widgets’ and then select ‘Add New Widget’.
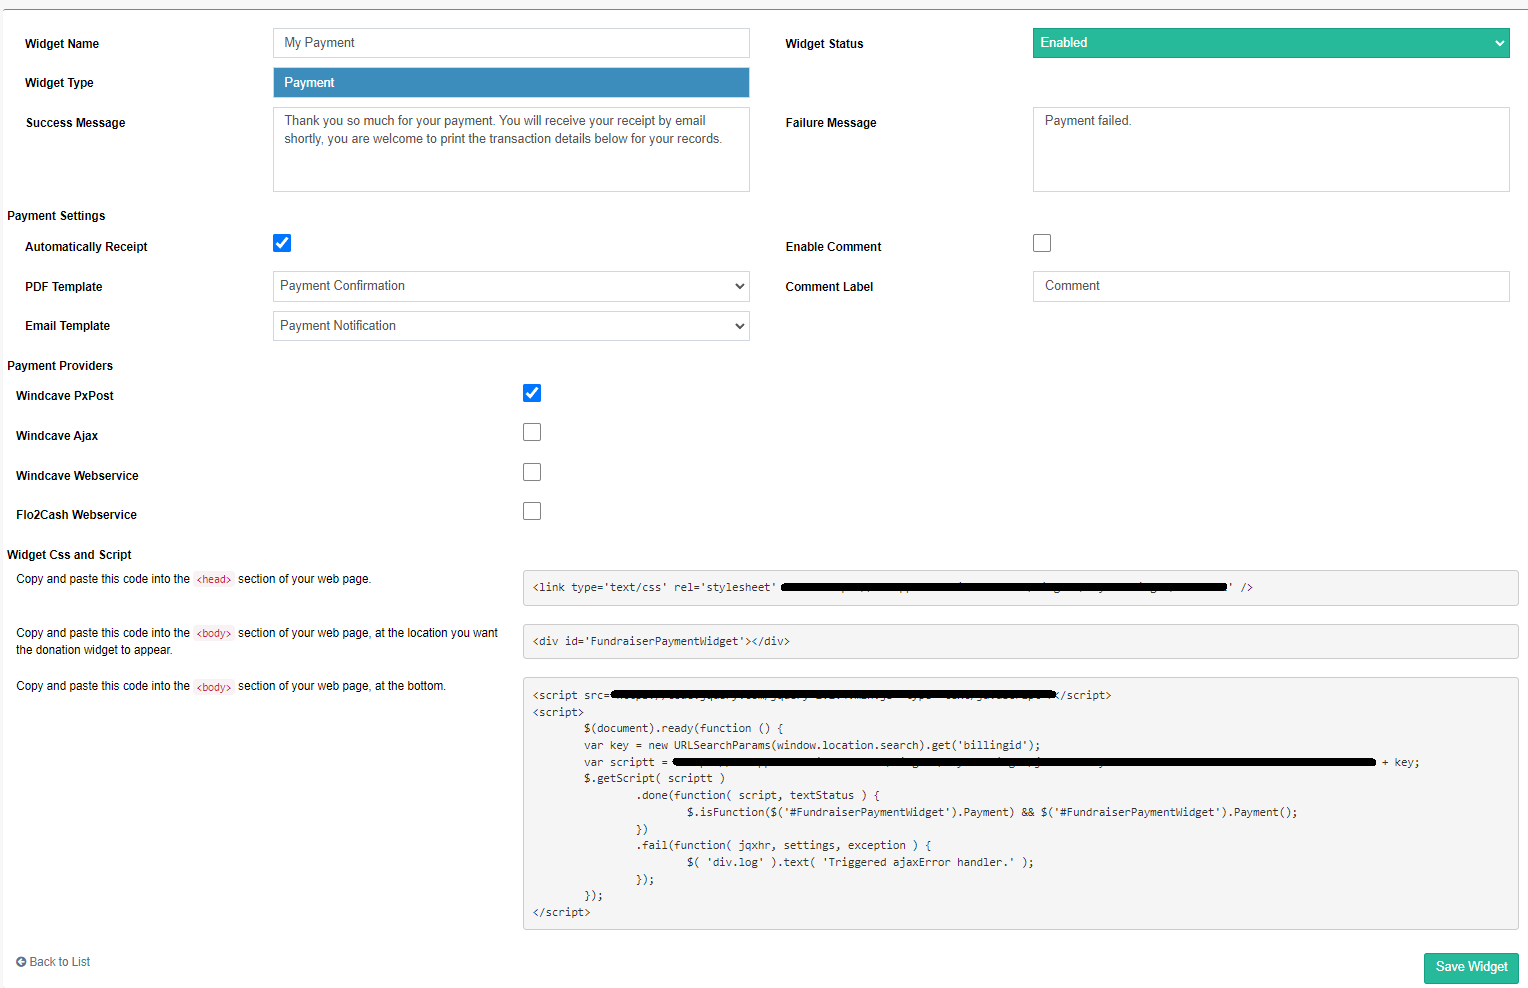
Step 2: Enter the Name of the widget this only used for reference widget it not seen publicly. Select Type as Payment. Leave Status as Enabled and select Save Widget.
Step 3: Select the confirmation templates you want the recipient to receive once a payment is successfully processed.
Step 4: From Payment Providers only select the default payment service to be used to process a card.
Step 5: There are few other options like whether transactions processed will be marked as receipted and if a comment box is required on the payment widget as an option. Generally for Regular giving Automatically Receipt should be unchecked.
See how to set up Billing Notifications