Donation widgets can be used to sell tickets by enabling the ticket options within the widget. There are a few things to consider when setting this up.
Step 1: Create two templates: an Email Template and a Ticket/Receipt Template.
The Email Template will be sent to the purchaser and should include a welcome message, directions, and event information. The Ticket/Receipt Template will display the tickets purchased, any partners listed, and any dietary information. This can be added using the Transaction Description merge field.
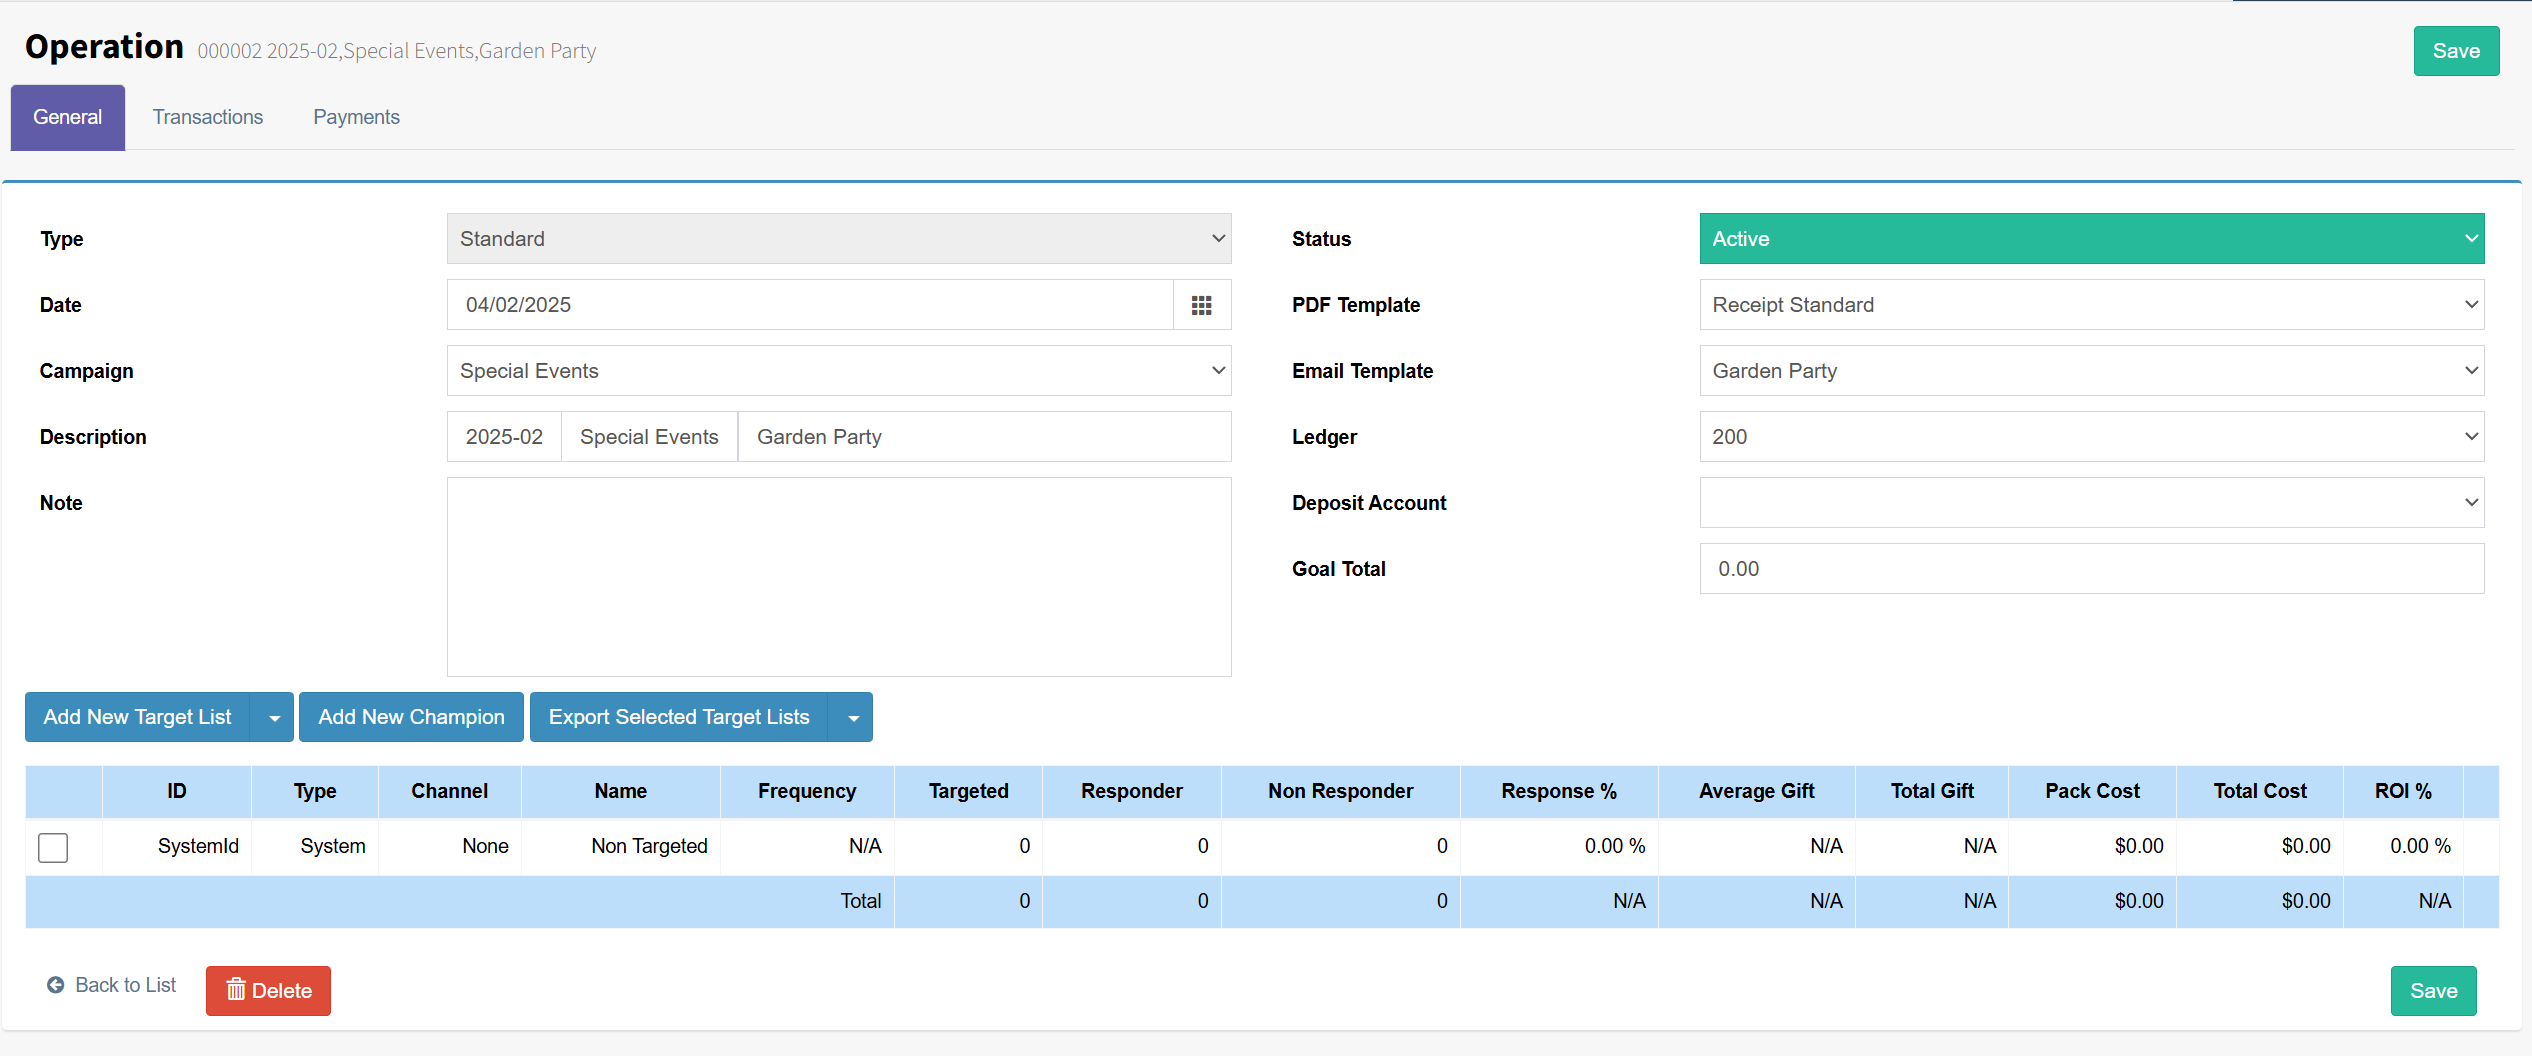
Step 2: Create a new Operation for the event, similar to the example below, and apply your templates. The example uses a Campaign called Special Events. You’ll need to create something similar, as it is used to group all events together.
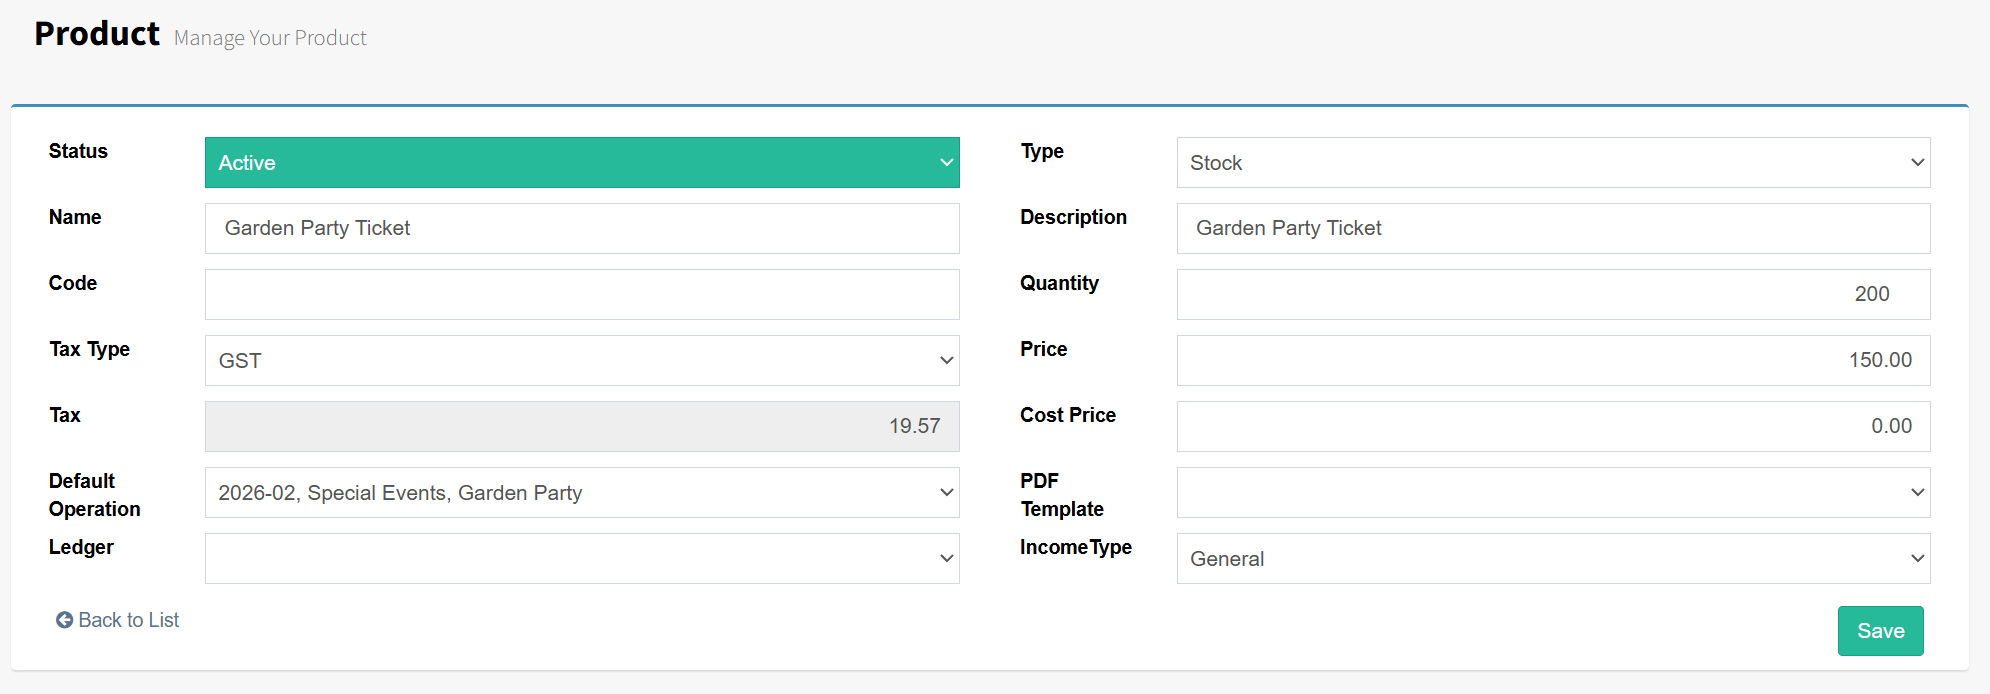
Step 2: Create a new Product to use for ticket purchases by going to Settings > Products and selecting Add New Product. It’s important to set the Type to Stock, name your ticket, add the Price, and set the appropriate Operation.
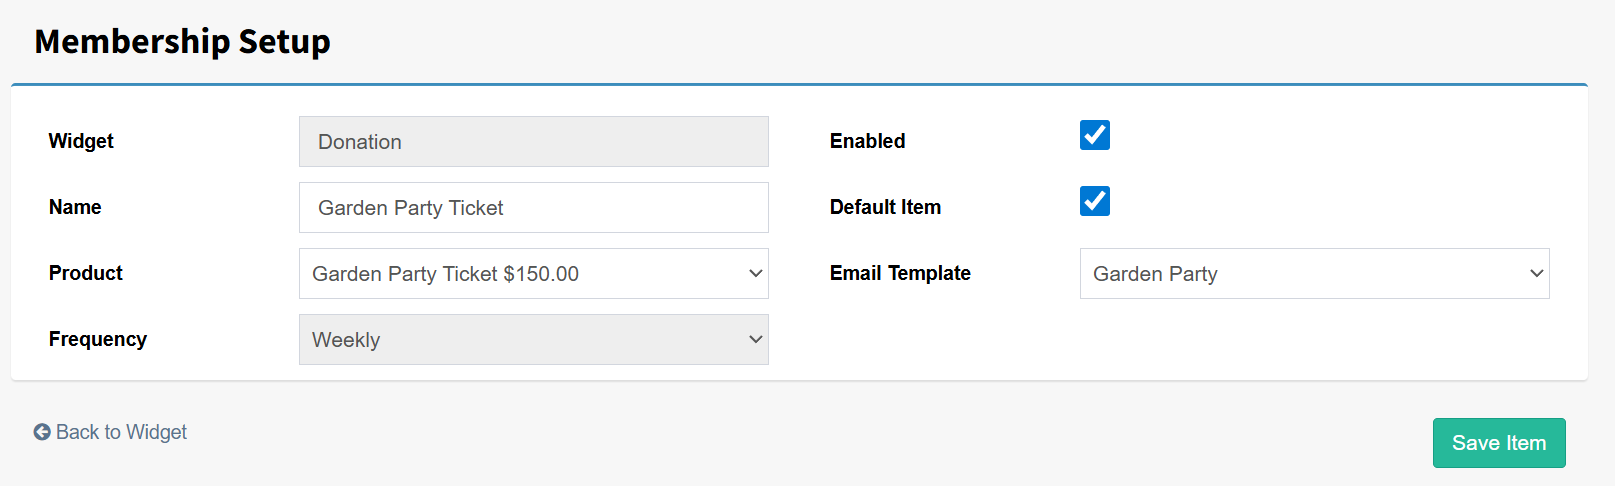
Step 3: Create a new Donation Widget. Use the related article for further guidance on setting one up. It’s important to note that a Donation Widget is used in this case because the purchaser can also make a donation at the same time as buying tickets.