Step 1: Install the the Volunteer Timesheet App onto your device.
Step 2: Go to settings in the App by press the the Cog icon.

Step 3: The settings screen will appear.
App Title Name: Changes the name of the app on the home screen. This can the name of your organisation if you want personalisation.
App Administrator Password: Add a password this is to access settings. The volunteers do not require a password.
FundraiserOne API Key: Create an API key in FundraiserOne and paste it here. This section shows you how to Create an API Key.
Note: The API is required for the App to communication with the CRM otherwise will only store the data locally.
Volunteers Can Edit Their Own Times: Allows volunteers to add their own times or it can use current time for signing in and out. Leave this checked.
Submit Time-sheets at Login: Having this option checked it will send them to FundraiserOne when they have been entered at real time otherwise they are batched to be uploaded by the Administrator by selecting View Records. From here the administrator can push them to FundraiserOne.
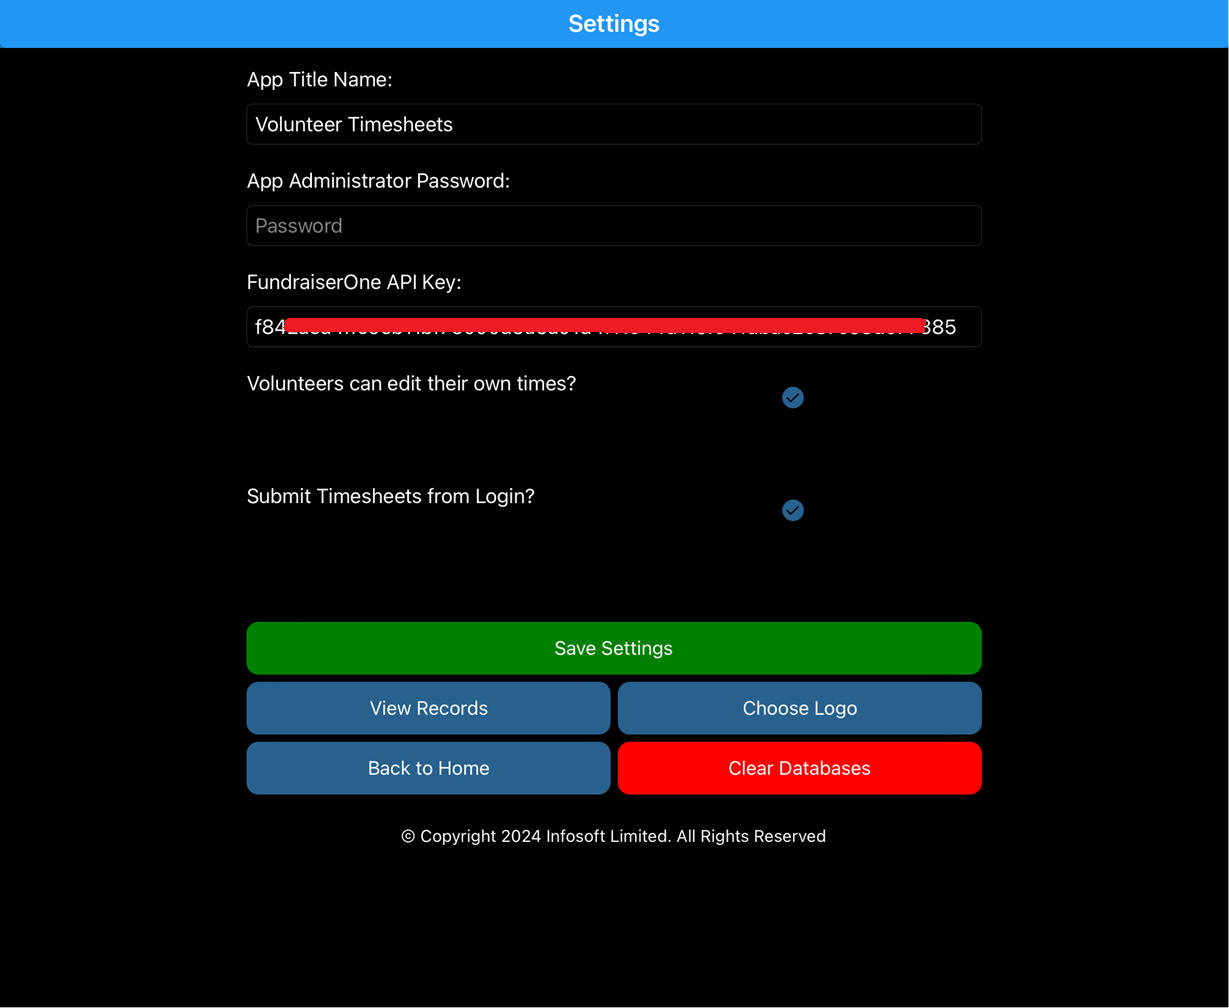
Save Settings: Saves data entered it recommended you once the above information is added.
View Records: This views the locally stored data. This will be blank if the Submit Timesheets from logon is checked.
Choose Logo: Logos can be uploaded for the home screen this allows you to personalise the app further. This is optional.
Back to Home : This returns the app back to Home screen.
Clear Databases: This will delete locally stored timesheets only. It does not clear any data from FundraiserOne.