This article explains what One Push Notifications are, the purpose they serve, and how they can be effectively used within the system. It outlines common use and how to set up and configure One Push Notifications to ensure they are delivered accurately and at the right time.
One‑Push Notifications are used to send scheduled messages to contacts through a supported communication channel, such as print, email or SMS. These notifications are designed for single contact instance communications rather than a selected group of contacts.
Each notification is built from a predefined template and scheduled with a specific date and time. When it’s triggered, the system automatically merges the relevant data to personalise the message.
When setting up a notification, users can choose to send it automatically or leave it in a merge‑ready state for review if it needs to be checked before delivery.
Instructions on how to set up a One-Push Notification:
Step 1: Find the desired Contact using Contacts from the menu.
Step 2: Go to the Notifications tab and select Add New Push Notification.
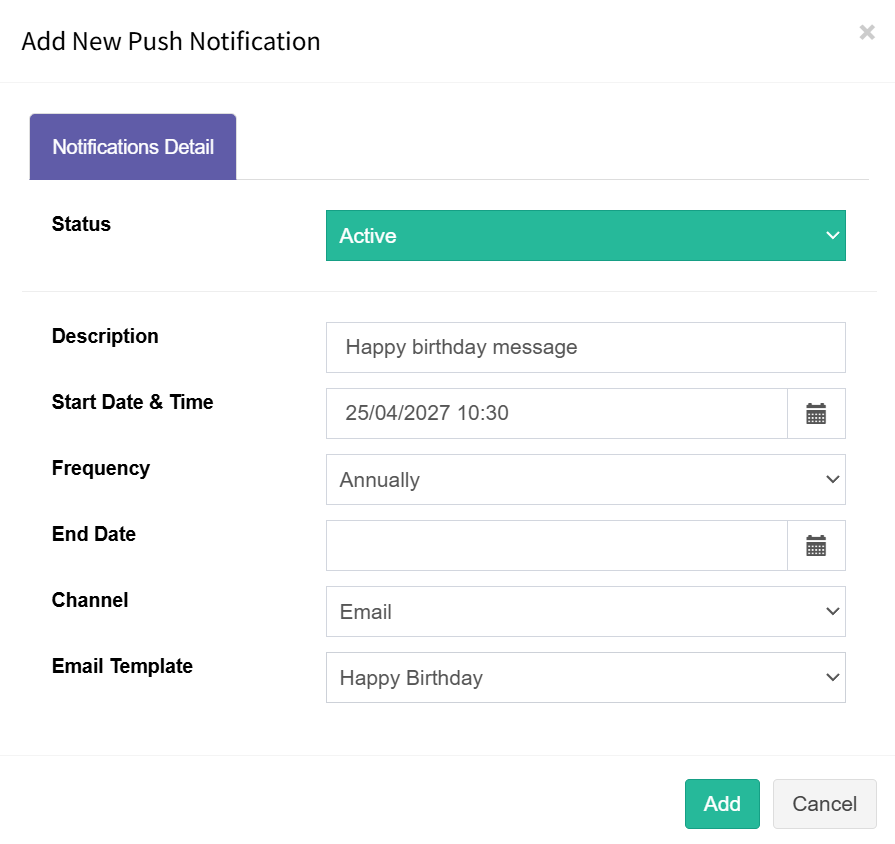
Step 3: Enter all your data like in the example above and press the Add button.
Step 4: Press Save on the Contact card to store the data.
Note: Start Date & Time must be in the future and not back dated. Back dated notification will not run.
Field Definitions
Status: Determines whether the notification is active. Only notifications set to Active will be sent.
Description: Free‑text field used to describe the purpose of the notification.
Start Date & Time: The date and time when the initial message will be sent
Frequency: How often the message will be sent.
End Date: The date after which notifications will no longer be sent. Leave blank if no end date is required.
Channel: The communication channel used to send the notification.
Template: The template that will be merged with data and sent to the contact.