The Merges area is where all document, email, SMS, and data‑export processing takes place. Any time the system needs to generate personalised communications or export information, the merge engine handles the task in the background so users can continue working without interruption.
The Channel indicates what type of output is being processed — whether it’s a document, email, SMS, or data export. This makes it easy to understand exactly what the system is generating and how each task will be delivered.
By handling these tasks in one place, the system ensures merges run efficiently in the background while giving you full visibility and control over what is being produced.
What the Merges Area Does
Processes documents, emails, SMS messages, and data exports
Runs tasks in the background, so users don’t need to wait
Allows editing of individual items (letters, emails, SMS) after the merge is complete
Supports adding or removing contacts before sending
Provides visibility of all active and completed merge tasks
The ability to add attachments to emails sent.
Understanding Channels
Each merge task is assigned a Channel, which determines what type of output is being created:
Email – Sends an email to each contact
SMS – Sends a text message
Document / Print – Generates PDFs for printing
Export – Creates a CSV file
If a merge involves multiple channels or multiple documents, the system automatically creates separate merge tasks for each one.
Templates in Merges
When a merge is pre‑populated, it will always include at least one contact. From the merge screen, users can:
Select a Template to merge
Add additional details that will appear in the contact’s communication history
Review or personalise items before sending
Methods for using merges
Sending to the merge screen with a pre-populated contact list
This can be done from several areas:Contacts by selecting Merge Letter, Email, or SMS
Operations by exporting target lists, which also sends data to Merges
Creating a new merge list
You can build a fresh list by selecting customers using the Query Generator within Merges.
It’s helpful to be familiar with these different methods to make the most of the merge functionality.
Merging & Sending an email
For merges that are pre-populated with contacts a template needs to be selected with extra detail for new merges a Customer Selection needs to be done which is done using the Query Generator.
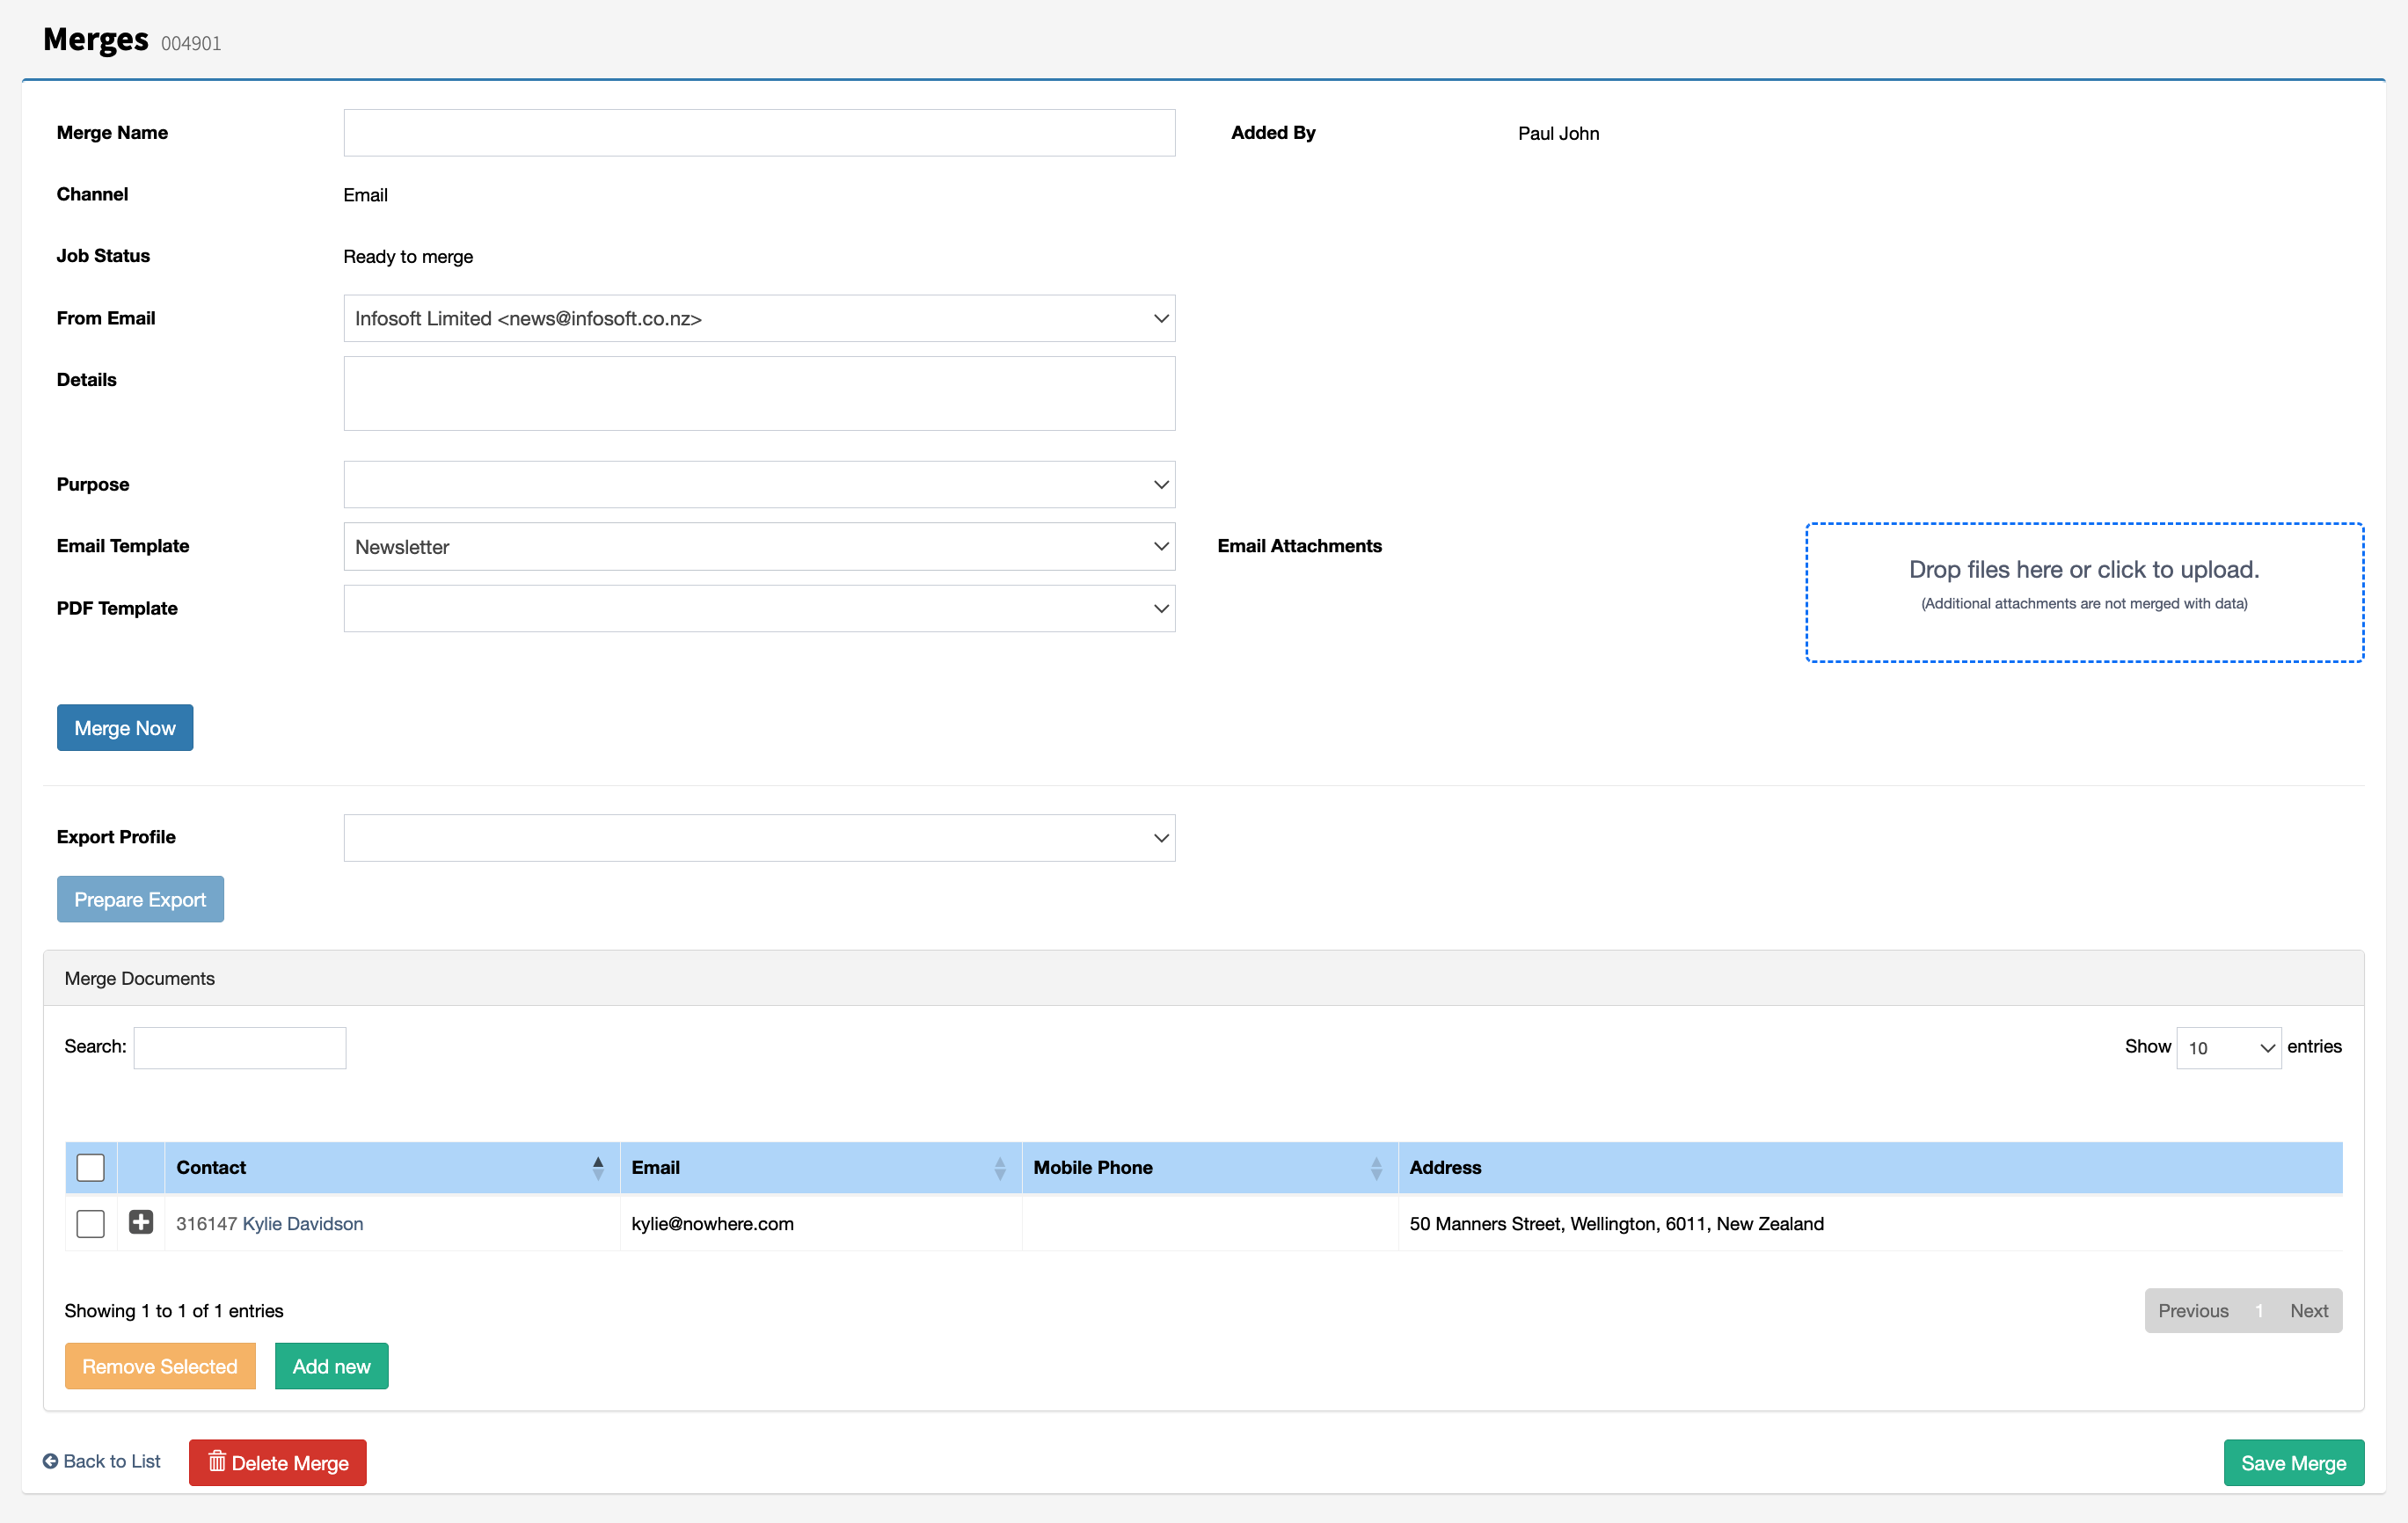
For email merges, an Email Template must be selected — this is the message that will be sent to the recipient. A PDF Template is only required when sending receipts or invoices through the Email channel, or when the channel is set to Print.
Once the Email Template is selected, press Merge Now to generate the personalised documents for the selected contacts. The Job Status determines how the processing duration.
Adding & Removing contacts from a merge
A Contact can be removed from a merge, if required, by selecting the Remove Selected button. At least one contact must be selected before the Remove Selected button is enabled. The Add New and Remove Selected buttons are only enabled before the data has been merged.
New contacts can be added to a merge task; however, they can only be used to send general letters and cannot be used to send transaction data for receipting or invoices.
Adding attachments to an email
When sending an email, attachments can be added before the email is sent by selecting the Email Attachments button or by dragging and dropping files onto it. It is recommended that attachments are less than 5 MB in size.
Note: Sending larger files may cause some email servers to reject your email.
Editing merged documents
Once document are merged they can be edited by expanding the + on the contacts name. If the Edit button can bot be seen Save the merge first. It is possible to have an Email and Print document for one contact. This can been seen during receipting where a personalised email is sent with a PDF receipt document.

Send now
When Merging complete documents can be edited or Sent. To send press Send Now or use the down arrow to Send Later where a date and time can be scheduled.

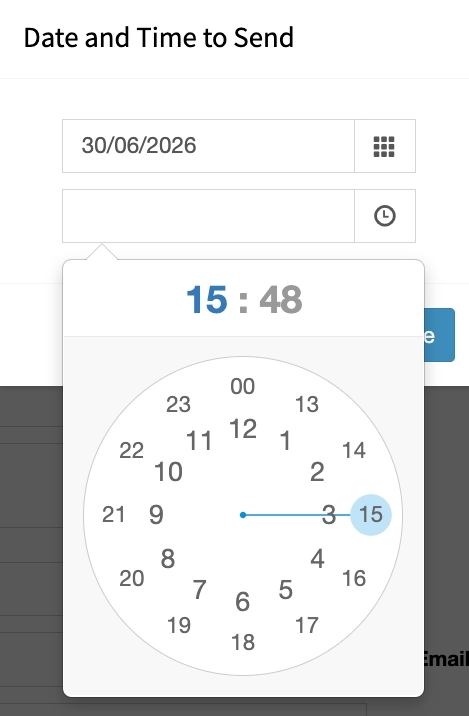
Scheduled send later
Select the date and time you want the message to be sent. The clock uses a 24‑hour format. Set the time by choosing the hour first, then the minutes.
Changing a scheduled send
A scheduled send can also be updated directly from the Job Status field by selecting the Change button. This allows users to quickly modify the scheduled send date and time if adjustments are needed after the merge job has been created, without having to recreate the entire scheduled merge. Any updates made are automatically saved and applied to the pending merge job, provided the job has not already started processing.

Merge screen definitions
Name: This is used to identify the merge. (Optional)
Job Status: The process stage.
Details: Notes that are added into Communication History. (Optional)
Channel: How is the document going to be delivered.
Purpose: Notes that are added into Communication History. (Optional)
Email Template: A selection of e-mailable templates, select the one to be emailed.
Email Attachments: An option to add attachments with the email being sent. (Optional)
PDF Template: A selection of printed documented. (Optional when emailing used when sending receipts and invoices)