This first section explains how to review transactions and send all annual receipts to donors. Before you begin, make sure your annual receipt templates are up to date. You’ll need an Email template for the message and a Print template for the receipt that is converted to PDF and Email or Printed depending how the donor wants to receive their receipt. The second section shows how to select donors individually to be receipted.
Bulk Receipting -Review Print and Send All Receipts
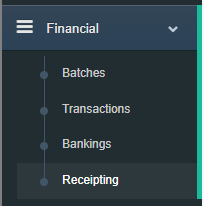
Step 1: Firstly select Receipting from the side menu by expanding Financial.
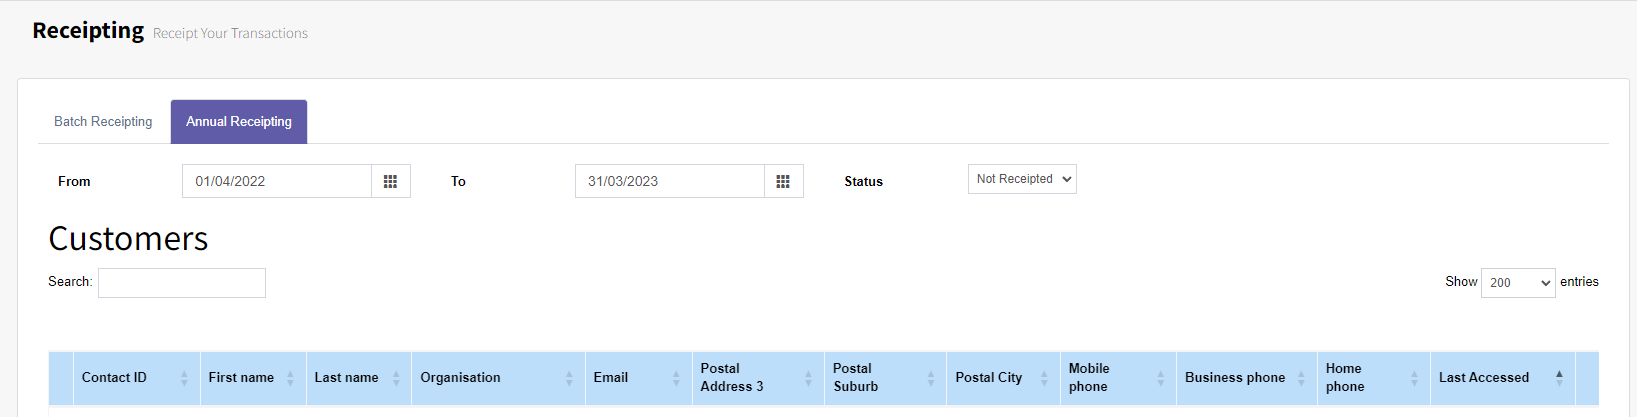
Step 2: Now select the Annual Receipting tab.
Step 3: Select the financial year date parameters from and to and leave status to Not Receipted. This will load all contacts that require a receipt.
Tip: This list of contacts is generated whenever a contact has at least one transaction marked with “Receipt Annually.”
Step 4: This step allows you to review regular givers. Use this list to check donors and their Transactions—monthly donors should generally show 12 transactions for the year.
The Regular Payments Transactions Report is also useful. It provides a list of regular givers and shows how many transactions were processed during the financial year. Donors must have Regular Payment Schedule records for this report to work correctly. Now click the green Select & Receipt All Annual Contacts button.
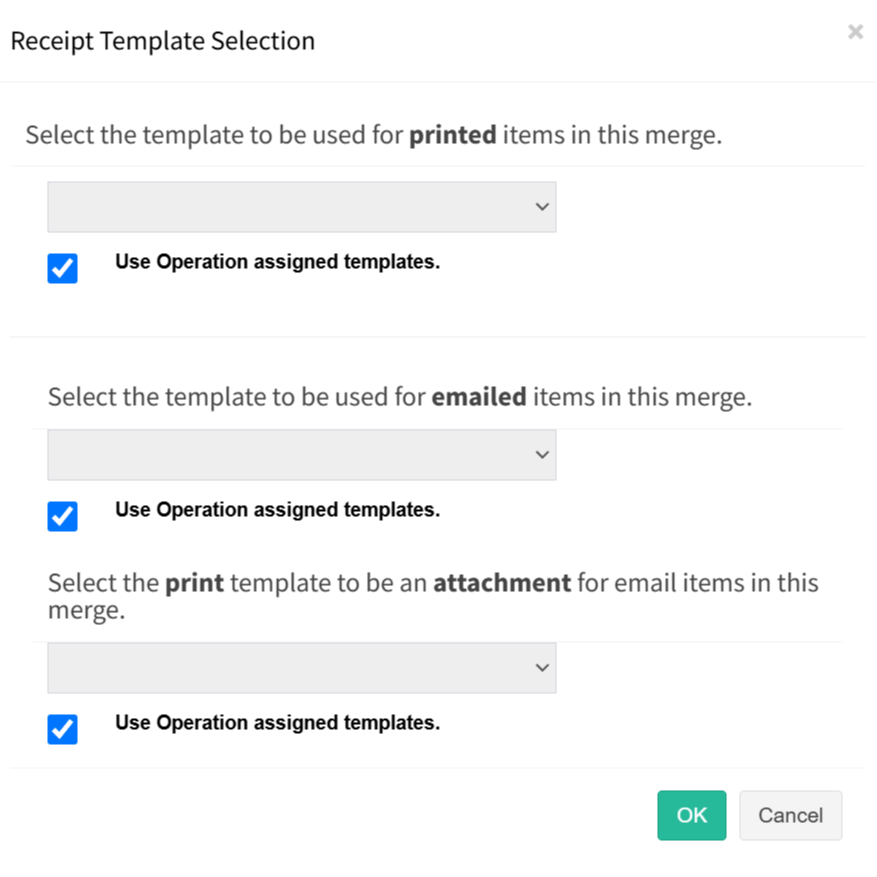
Step 5: The Receipt Template Selection screen will appear. This screen allows you to either use the default Operation Templates or override them with specific templates.
Using Operation Templates means the system will apply the templates assigned to each Operation, so the receipt generated matches the project the donor is supporting.
In most cases, it’s best to uncheck the option to use Operation Templates and instead manually select the templates you want to use.
Step 6: Select OK once you’ve chosen your templates. The system will then prepare the data and create the corresponding Jobs, where the receipts can be merged, printed, and emailed.
Be patient—this process usually takes 4–5 seconds. If there are both printed and emailed receipts to generate, the system will create two separate jobs: one for printing and one for emailing.
Tip: Transactions are marked as Receipted when merging process starts.
Individual Receipting -Review Print and Send Selected Contacts
When selecting contacts individually, all associated transactions for the chosen period will appear below. Make sure the Show Entries filter for transactions is set to All—this is the default. You can choose to work with all contacts or select specific individuals, and the system will load all transactions that match your selected criteria.
Use Select Visible for both contacts and transactions to finalise your selection. Then click Receipt Selected to generate receipts for the contacts and transactions you’ve chosen.

Step 1: At the ‘Transactions’ section, select the transactions that require receipting. Use the Select Visible underneath each of the sections.
Tip: Make sure all transactions are select by setting the page filter to All.
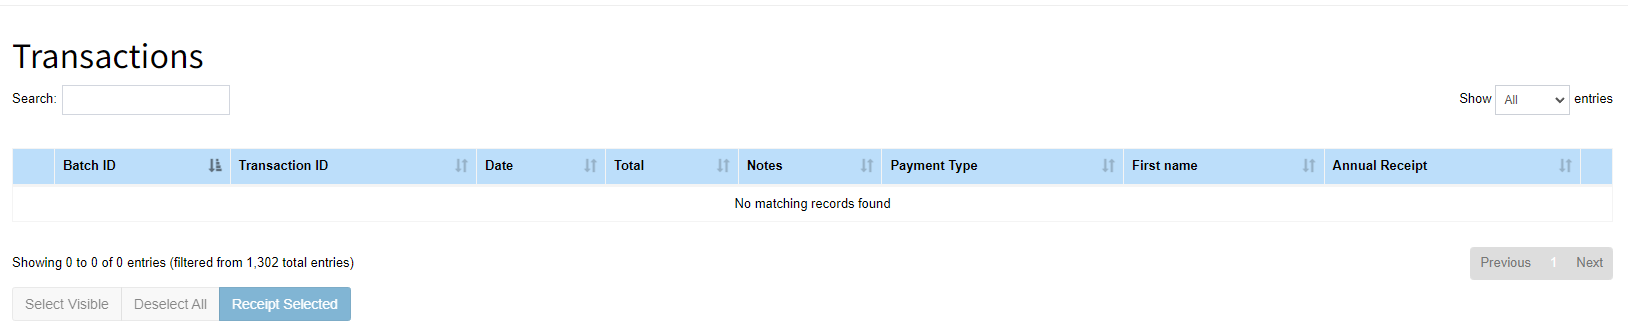
Step 2: Now press the Receipt Selected button.
The Receipt Template Selection screen will appear. This screen allows you to either use the default Operation Templates or override them with specific templates.
Using Operation Templates means the system will apply the templates assigned to each Operation, so the receipt generated matches the project the donor is supporting.
In most cases, it’s best to uncheck the option to use Operation Templates and instead manually select the templates you want to use.
Step 3: Select OK once you’ve chosen your templates. The system will then prepare the data and create the corresponding Jobs, where the receipts can be merged, printed, and emailed.
Be patient—this process usually takes 4–5 seconds. If there are both printed and emailed receipts to generate, the system will create two separate jobs: one for printing and one for emailing.
Tip: Transactions are marked as Receipted when merging process starts.
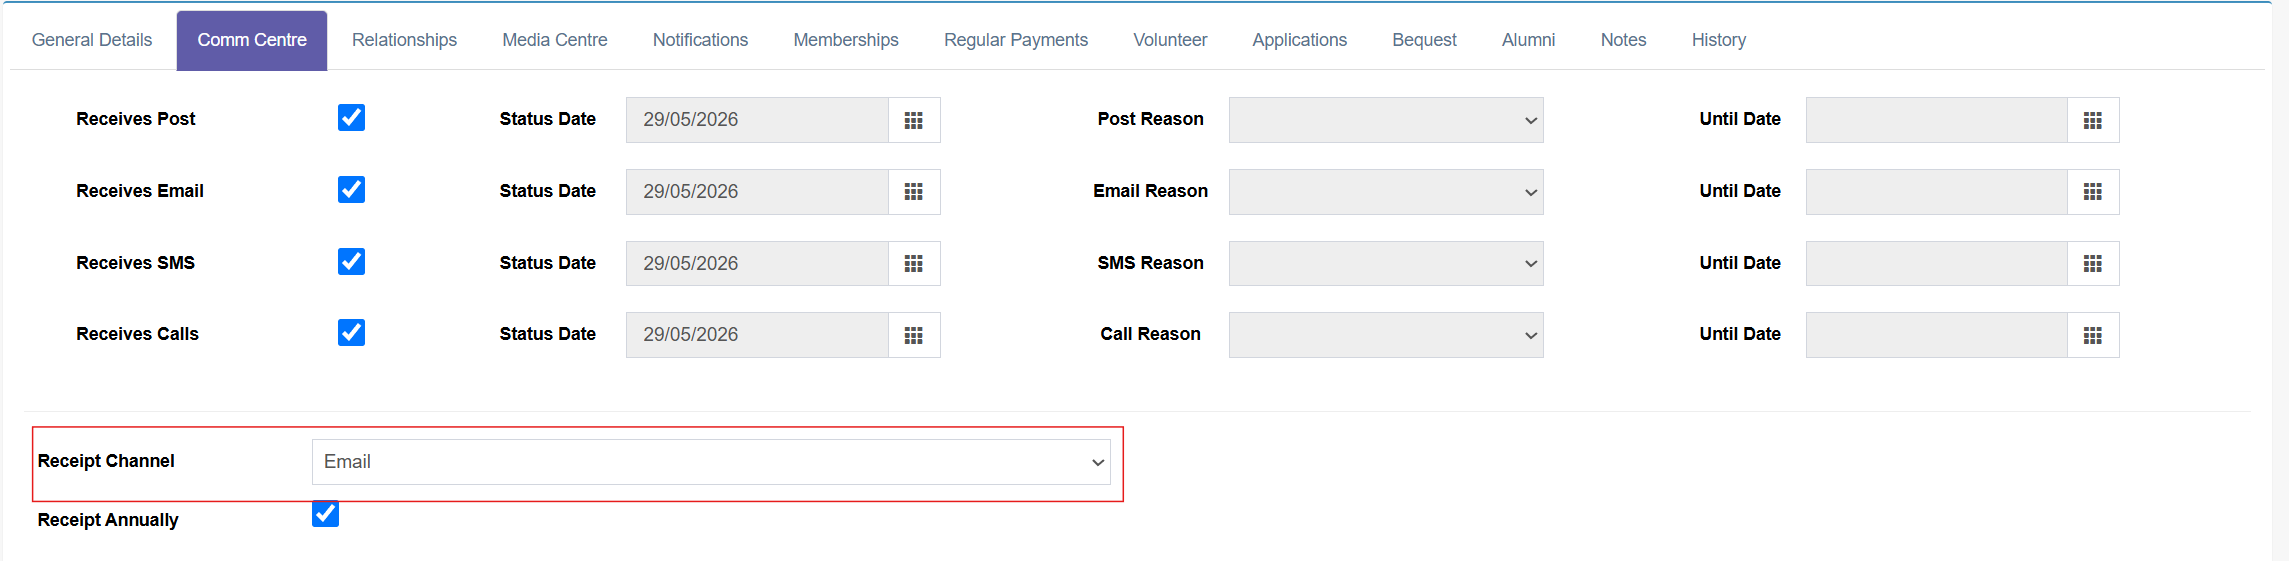
Changing a Regular Giver's Receipting Channel Preference
When a contact requests that their receipt be sent via Email or Print, this can be updated using the Receipt Channel drop-down which can be found in the Comm Centre tab in the Contact card. Once the preferred receipt channel has been selected, regenerate the receipt using the Individual Receipting process to create the receipt in the chosen format.