From the side menu select Financial and select Receipting.
In Receipting there are two tab options for receipting, Batch Receipting and Annual Receipting. The receipting status filter should default to Not Receipted. This can be changed if batches or transactions in a batch need to be receipted again.
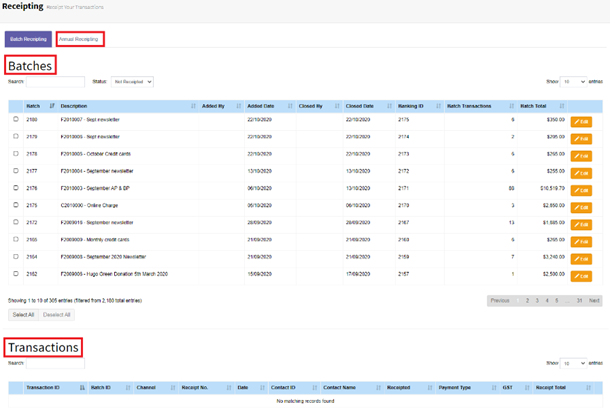
Step 1: Select the batch or batches that need to be receipted. One the batches are selected Transactions will appear below.
Step 2: At the Transactions section, select the transactions that require receipting. Now select transaction to be receipted in the batches selected using the Select Visible button.
Tip: Make sure all transactions are select by setting the page filter to All.

Note: There is a search function for both batches and transactions to aide in finding the desired batches/transactions.
Step 3: Once all of the transactions are selected, select the Receipt Selected button. This will prompt Receipt Template Selection screen screen. This allows the override on the automatic templates to be used or force templates to be used instead of the ones set for the Operation.
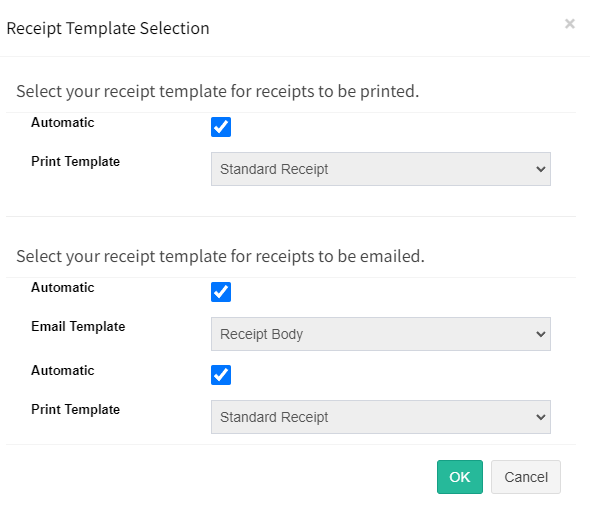
Step 4: Select the OK button once selected the template selection. This will prepare the data for Jobs where it can be merged printed and sent by email. Be patient it does take 4-5 seconds to create the jobs. Typically if there are receipts to be printed and emailed the system will create two jobs one for printing and the other for emailing.
Tip: Transactions are marked as Receipted when merging process starts.